avatars

Avatar upload

It is now possible to upload avatar for guest roles.

This is a new feature: guests are not authenticated users: it was impossible to associate an avatar to a no permanent user whose id changes all the time.

Thanks to fingerprinting, we generate now an unique permanent id for guest and avatars are correctly associated to that id.

You can test that new feature on your own chat

Messenger mode

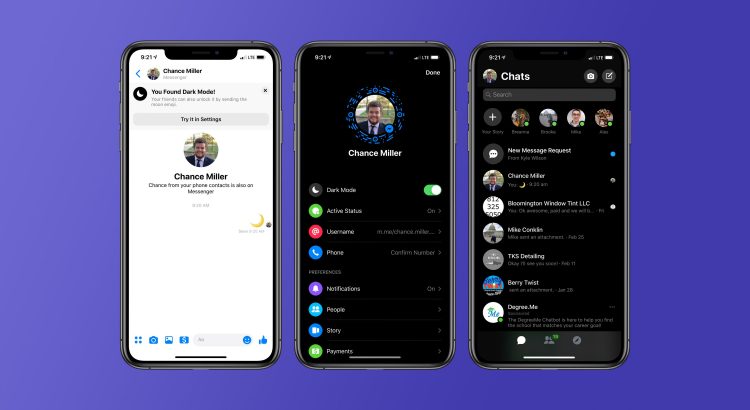
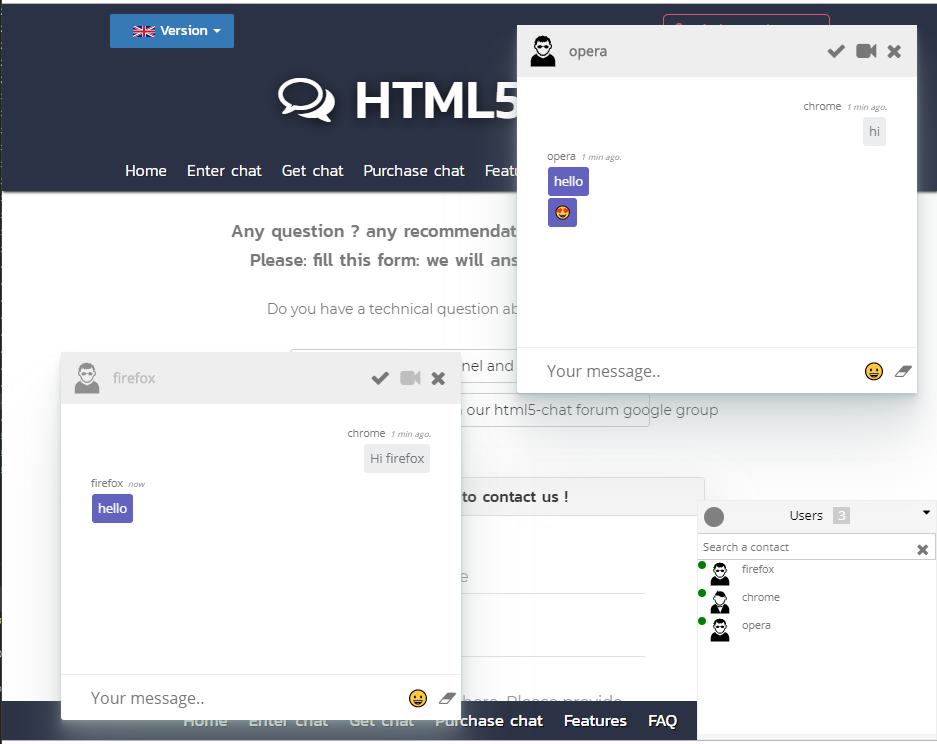
Html5 chat has now a new mode : the “messenger” mode

What is the messenger mode chat like ?

The messenger mode like has these features:

  • it embeds inside an existing website
  • the page is not exclusive to the chat. In fact chats inserts inside the page
  • it is one to one chat only, with exclusive video/audio calls when you can choose users between list of connected users and users who already sent you messages: it works with online and offline users
  • when user or you change the page, all chats are restores. So it is suitable with any websites, including websites that are not Single Application Pages

How to set up the messenger mode on my site ?

Go to chat admin and choose “Messenger mode”

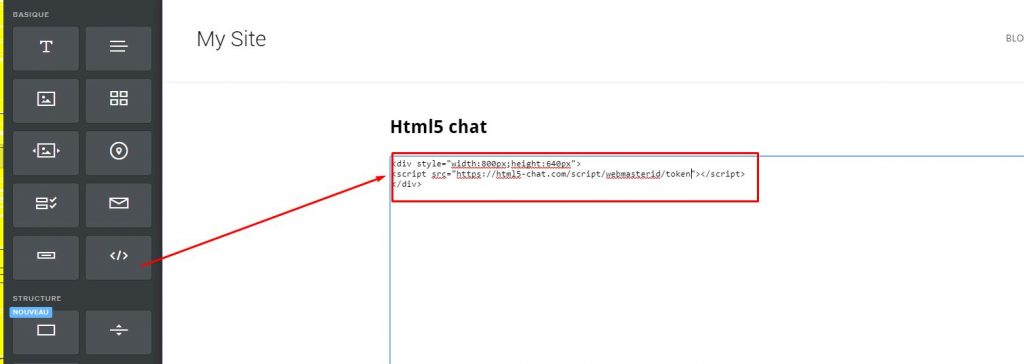
Make sure you add the script to ANY page where you want the script to be present. A good technique is to use a common page to all you site like inside footer.php

<script src='https://html5-chat.com/script/webmasterid/token'></script>

Replace webmasterid and token by your webmasterid and your token. You can find that inside your chatadmin panel

How to pass user parameters to the chat ?

If you just use the script like, you user is not identified by the chat: he will need to input his username and will be assigned a random id and random avatar.
If you want to specify an username, id and avatar, you need to pass some extra parameters to the script. Use JWT to encode these parameters and pass them to the chat as shown in this sample:

<?php
$json = json_encode(array(
        'id'        =>xxx,
        'username'  =>'yourUsername',
        'password'  =>'password of your html5-chat account',
        'avatar'    =>'https://html5-chat.com/img/malecostume.svg'
));
$encoded = file_get_contents("https://jwt.html5-chat.com/protect/".base64_encode($json));
?>
 <script src='https://html5-chat.com/script/webmasterid/$encoded '></script> 
  • xxx is an unique id user
  • username : is an unique username for user
  • password: is your html5 chat password account
  • avatar is the url of the user avatar

You should test the demo, with 2 browsers.

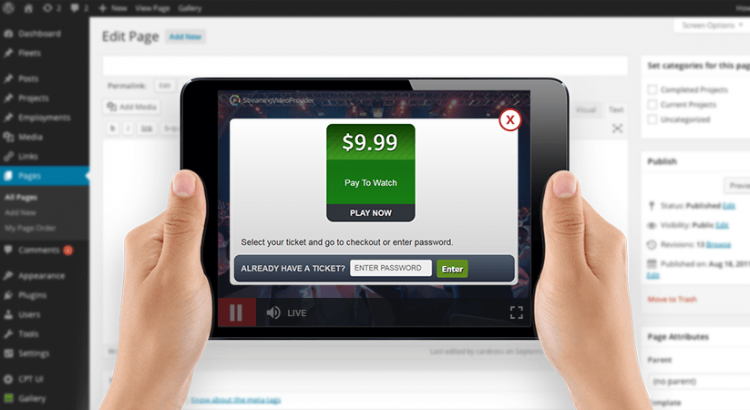
HTML5 and Payperview

A new exciting feature: Pay per view mode with HTML5 chat is now available for paid (registered users)

What is “Pay Per View” ?

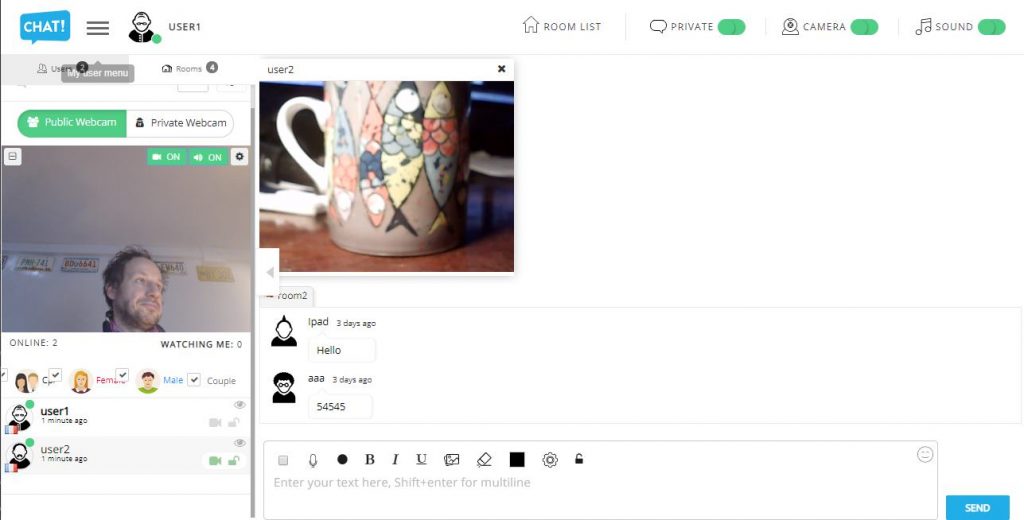
Pay per view is a special kind of chat where a performer displays his webcam to watchers. This is 1 to many chat : indeed a conference mode chat.

Public and private chat

A watcher can request a private chat to performer. If the performer accepts, other users will be ejected from the room and private chat between the performer and requester starts.
During the private chat, credits from user are decremented and private session data records duration of the private chat. This is why it is called : pay per view: as long as user stays in private chat, he pays (credits) for the show.

Pay per view video chat : what for ?

This pay per view mode is suitable for:

  • E-learning sessions, teachers
  • Erotic pay per view shows (livejasmin like)
  • Clairvoyance site, astrologists
  • Consultants, lawyers
  • Any kind of chat when you need user to pay to watch private cam

How does it work ?

A webmaster can have many performers. When user arrives to the performers wall, he will see performers photo avatars and status: online, offline or busy (already in private chat). He clicks on the performer’s picture and enter the performer’s avatar. If he has credits, he can request a private chat and private chat will start as soon as performer accepts it.

2 different pay per view modes

We have 2 different pay per view mode integration:

  • Embed mode: no coding knowledge is required at all. You just defines prices, performers, insert your paypal email to receive payments and you are ready to go: this is a 5 minutes process.
    This is suitable for people with no coding knowledge at all. All data, records, reports, and performers data are stored on html5 chat servers.
    Here are details about how to setup the payperview in embed mode
  • External mode: you need some coding knowledge such as calling REST API, JSON encoding. This is suitable when you want all payment process and data to be stored on your own servers. This mode is suitable for people who owns already a website and have serious coding knowledge. This is a 2 – 4 hours process.
    Here are details about how to setup the payperview in external mode.
    Here are details about how to setup the payperview in external mode

If you need the external mode but do not have enough coding knowledge, we can do the job for extra cost. Please contact us by skype: proxymis

How to setup the payperview in external mode

The external mode allows you to host all data (like payments history, liveshows history, performer data) on your own server. However the webrtc chat is hosted on html5 chat servers.

This means that your server and the chat will have to communicate together. They will communicate through AJAX REST calls. That’s why you need to implement on your server some JSON answers so the html5 chat can request your server.

This means: you need developer knowledge to do that. If you do not have some, you can ask a freelancer to do the job for you (we can also do that for an extra fee). You can also choose the easy embed way to integrate the payPerView as described here. However the embed method means that all data are stored on our servers.

There are 2 pages to be created:

You have to create yourself these 2 pages that will be stored on your own server.

  1. the listing page: here are where users will see the listing of performers and where he can select a performer and join her into her room. (ex: listing.php)
  2. the model chat page: here is the place where performer will enter the chat. (ex: performer.php)

Database tables

In the external embed mode, you will have to store all data (models, payments, shows history). Here we provide some data structures you will need (but you can modify them or use your own)

Table ppv_tips : this is the most important table: it stores all tips that a performer receives from an user (as tip or as private live show).
We recommend you use the same structure as the one we provide here.

CREATE TABLE ppv_tips (
id bigint(20) NOT NULL,
date datetime NOT NULL,
action enum('tips','liveshow') CHARACTER SET utf8 DEFAULT 'tips' COMMENT 'is that tips or show ?',
userid int(11) NOT NULL,
performerid int(11) NOT NULL,
credits int(11) NOT NULL DEFAULT '0',
price decimal(10,3) NOT NULL DEFAULT '0.000' COMMENT 'price of the tip',
performerBenefit decimal(10,3) NOT NULL DEFAULT '0.000' COMMENT 'benefit a performer will get from that tip'
) ENGINE=InnoDB DEFAULT CHARSET=utf8mb4;
ALTER TABLE ppv_tips
ADD PRIMARY KEY (id);
ALTER TABLE ppv_tips
MODIFY id bigint(20) NOT NULL AUTO_INCREMENT;

Table ppv_item: table when you store items that clients will purchase (ex: 600 credits for 10$)
When an user purchases an item, you have simply to update his credits.

CREATE TABLE ppv_item (
id int(11) NOT NULL,
seconds int(11) NOT NULL DEFAULT '600',
price decimal(10,2) NOT NULL DEFAULT '10.00',
description varchar(255) CHARACTER SET utf8 NOT NULL
) ENGINE=InnoDB DEFAULT CHARSET=utf8mb4 COMMENT='prices of credits';
ALTER TABLE ppv_item
MODIFY id int(11) NOT NULL AUTO_INCREMENT;

The ppv_paypal : table that will store all transactions done using paypal (you can of course use any payment you want)

CREATE TABLE ppv_paypal (
id int(11) NOT NULL,
txn_id int(11) NOT NULL COMMENT 'transaction Paypal',
webmasterid int(11) NOT NULL,
userid int(11) NOT NULL,
price decimal(10,2) NOT NULL,
credits int(11) NOT NULL,
ppv_itemid int(11) NOT NULL,
item_name varchar(100) NOT NULL,
date timestamp NOT NULL DEFAULT CURRENT_TIMESTAMP,
log text NOT NULL
) ENGINE=InnoDB DEFAULT CHARSET=utf8mb4;
ALTER TABLE ppv_paypal
ADD PRIMARY KEY (id),
ADD KEY userid (userid),
ADD KEY ppv_itemid (ppv_itemid);
ALTER TABLE ppv_paypal
MODIFY id int(11) NOT NULL AUTO_INCREMENT;

Ajax Calls / REST

Now, when you created all data structures, you will need the HTML5 chat to be able to communicate with your server, especially to update the data you will store in the tables you created.

This article is still under construction. Please come back later….
How to setup the payperview in embed mode

The embed mode means that all data are stored on html5 chat servers. This mode is easy to be run and do not demand any coding knowledge. It can be setup in 5 minutes. Here is step by step process

In templates, choose the pay per view template
  • Go back to main menu : a new pink button called ” PPV Conference Management ” should appear in your global menu at the bottom.
A new button menu appear !
  • Go to chatadmin->PPV conference->performers and create (or edit) users that will be performers (role must be setup to performer). Make sure performer has photos (you can upload performers’ photos)
Edit/add performers
  • Then, on your website, you must then prepare 2 HTML or PHP pages for the chat:
  • Page where performer will enter the chat
    Ex: performer.php that will contain that script:
    <script src="https://html5-chat.com/script/xxxx/"></script>
    where xxxx is your webmasterid (you will find it in your chatadmin console)
    When you open that page, you should find performer’s login
  • Page when user will enter the chat:
    Ex: user.php that will contain that script:
    <script src="https://www.html5-chat.com/ppv_listing/xxxx"></script>
    where xxxx is your webmasterid (you will find it in your chatadmin console

The user script will display the list of all performers and their photos you have added with their status. If a performer is online, she will appear in green and user will be able to click her photo to enter her room.

List of models: green is online, red is offline, yellow is busy.

And that’s all: you are able to enter now as performer and as user.
When user clicks the green available mode, he enters that model room.

User Payment process and credits

You defined prices in your config panel. When user wants to purchase credits, he press the “purchase credits” button and a popup displays your prices. When he wants to purchase some credits, he will be redirected to the paypal account you also defined in your config panel.

You will receive 100% of that amount (we don’t take any commission).

Performers payments

That’s your duty to pay the models. You get performers reports inside your PPV Conference Management that includes private shows and tips a performer has received.
If you need to update credits, just go to users or performers data and you can edit the credits field.

Reports available in your payperview panel.

Summerizing it all

  • The embed mode is very simple to be setup. You setup your paypal email, define credits prices .
  • You add performers and setup the percentage an user will receive per purchased credit.
  • You create 2 pages : 1 for performer enter and one for user listing.
  • Public chat is free and private chat is paid. User can also send tips, credits to performer.
  • When user purchases credits, you will get the amount on your paypal account.
  • You also get some reports so you know how much you will pay to performer.
  • All this is simple and do not need any developer knowledge. If you have trouble, we are here to help you.

Customization

You can of course change the CSS of the chat and the listing page by injecting your own CSS.

template chat

Chat templates

Since html5-chat is growing and has new extra features every day, it becomes difficult to understand and have a global view of all features and options he offers: in order to simplify the usage of the chat, we decided to create ready to go chat templates

What are chat templates ?

Templates are ready to go configurations of the chat so you can quickly start with a ready to go chat feature. This allows you to avoid to configure the chat to make the chat work for you

What are the chat templates available ?

For now we have 3 ready to go templates:

  1. tabAndWindow:
    This is a classical multi users chat where new private chats are in separated tabs and where webcams open in drag-gable windows
  2. roulette
    This is a chat roulette mode. It picks up randomly an available user and plays his webcam. It is based on the chatroulette concept
  3. Shoutbox:
    A simple text only chat. It is based on the concept of shoutbox where people can quickly writes text messages.

Where to set up a chat template ?

You have to login into your chatadmin as usual and choose the right template. Be careful: This action will overwrite all configuration of your actual chat. This can also be a good way to reset or restore a messed configuration chat and start with a clean configuration.

New templates will be added continuously.

Html5chat for phpBB: Extension HTML5 Chat

You can now easily integrate your html5 chat into phpBB. Here are the steps:

Download

You can download the phpBB html5 extension form here

Requirements

phpBB 3.2.6-RC1+ PHP 7+

Features

Adds some preliminary data and a header link to a custom page.

Quick Install

You can install this on the latest release of phpBB 3.2 by following the steps below:

  • Create toxyy/html5chat in the ext directory.
  • Download and unpack the repository into ext/toxyy/html5chat
  • Enable HTML5 Chat in the ACP at Customise -> Manage extensions.

Uninstall

  • Disable HTML5 Chat in the ACP at Customise -> Extension Management -> Extensions.
  • To permanently uninstall, click Delete Data. Optionally delete the /ext/toxyy/html5chat directory.

License

GPL-2.0

How to add a web radio to your chat ?

What is a web radio ?

A web radio (also called internet radio), is a streaming service that allows you to broadcast your own radio through the web. Now days, it is very easy to start a free web radio over the web.

One of the most popular software to start a web radio is shoutcast

How to add it to your html5 chat ?

Once you have created your own radio, you will probably get an http links such as: http://mywebsite.com:8040/stream

Just copy and paste that link into your config panel, under webradio input text. A small audio player should then appear at the bottom of the chat.

audio radio player in the bottom of the chat

Generate screen shot of url in the chat

What is a screenshot preview ?

New feature: when sending an URL, it is now possible to generate a screenshot of the url : it means a picture of the url so users can preview the url before they decide to enter it.

This feature is only available for paid members of the chat.

How to activate it ?

You just need to go to your chatadmin panel and it will be present in the config panel.

How does it work ?

You just the screenshotUrl option and next time you will send an url, the chat will generate a screenshot of that url.

So when an user clicks on an url, he will get a modal popup before that previews the site, before he navigates to that url

Better chat news management

We have improved the news management system. You can set the time of the day when the news will be displayed.

news 1: between 12:30pm and 14:30pm
news 2: between 16:30pm and 18:30pm

You can also setup the frequency in minutes of each news
ex : news 1 will be displayed every 5 minutes.

Modal important news

For important news, you can also set up a modal news that will be displayed in a modal window when you enter the chat. This news will be displayed only once (ex: to announce an important event)

be displayed in a modal window when you enter the chat. This news will be displayed only once (ex: to announce an important event)

You can find these features as usually in your chatadmin panel

Better news announcement in chat