If you’re looking for an easy and professional way to add a real-time chat to your website, HTML5-Chat.com is one of the most powerful and flexible solutions available today. Whether you want to embed a chat in a WordPress page, integrate a chat in full-screen mode, or display it inside a specific container, the installation takes less than 30 seconds and requires no server, database, or complicated configuration.
In this guide, we explain step by step how to install and customize HTML5-Chat, and we provide real examples of code—including fullscreen layout and fixed-size versions.
Why HTML5-Chat.com?
HTML5-Chat.com is a 100% browser-based real-time chat system. You don’t need to install scripts on your server and there is no need for PHP or MySQL. Everything runs via a simple <script> tag.
Key features
- Real-time communication
- Mobile-ready and responsive
- No backend required
- Secure and scalable
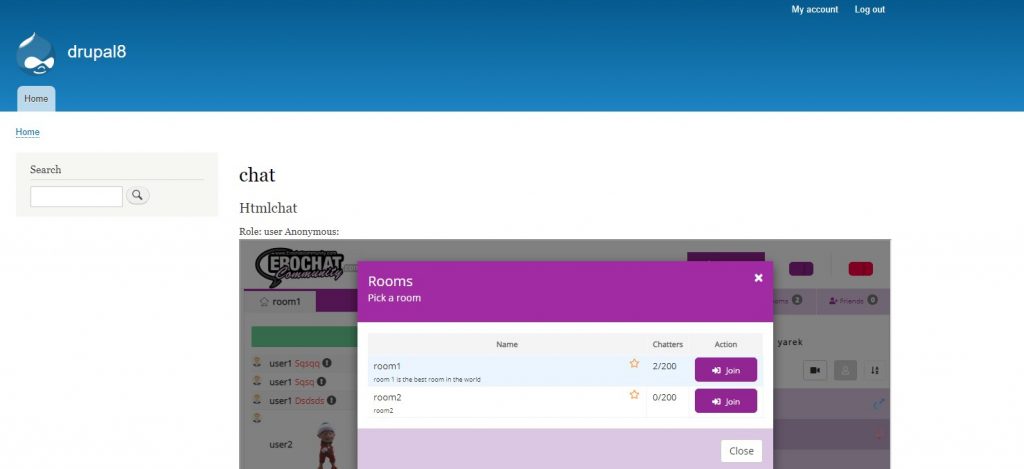
- Password-protected or open rooms
- Multiple chat rooms, private messages & avatars
- Easy to customize
Because integration is so quick, HTML5-Chat.com is the perfect solution for:
- Online communities
- Live support and customer chat
- Clubs and associations
- Gaming websites
- Event chat rooms
- Social networking platforms
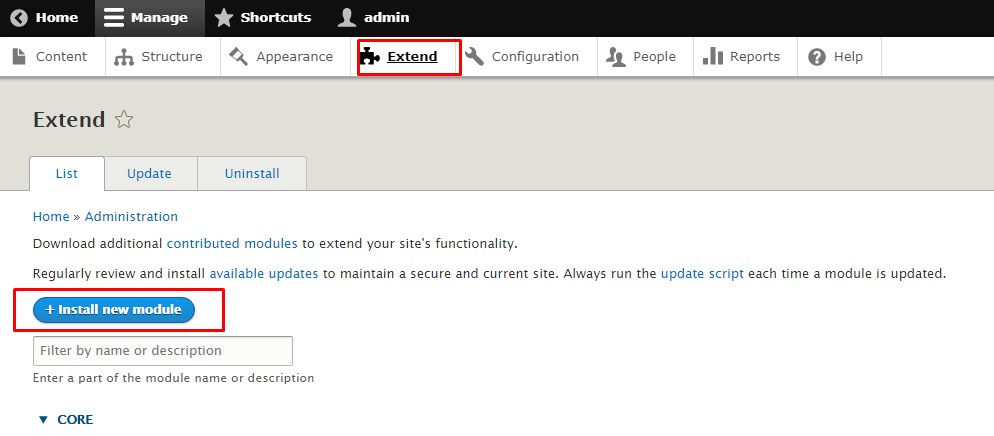
How to Install HTML5-Chat in WordPress
Step 1 – Create or open a page in WordPress
Go to:
Pages → Add New
or edit an existing one.
Step 2 – Paste the embed code
HTML5-Chat gives you a script like this:
<script src='https://html5-chat.com/script/1/56c5dfd75c71c'></script>
You can paste this inside:
- Gutenberg HTML block
- Elementor HTML widget
- Divi Code Module
- Classic editor (Text mode)
That’s it. The chat is online.
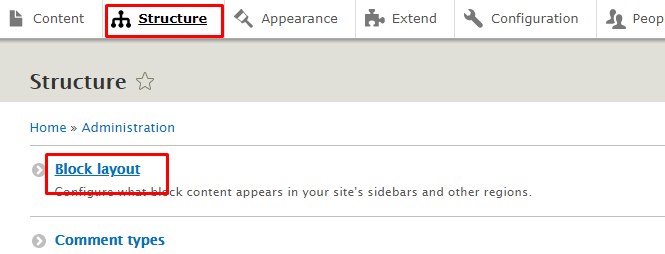
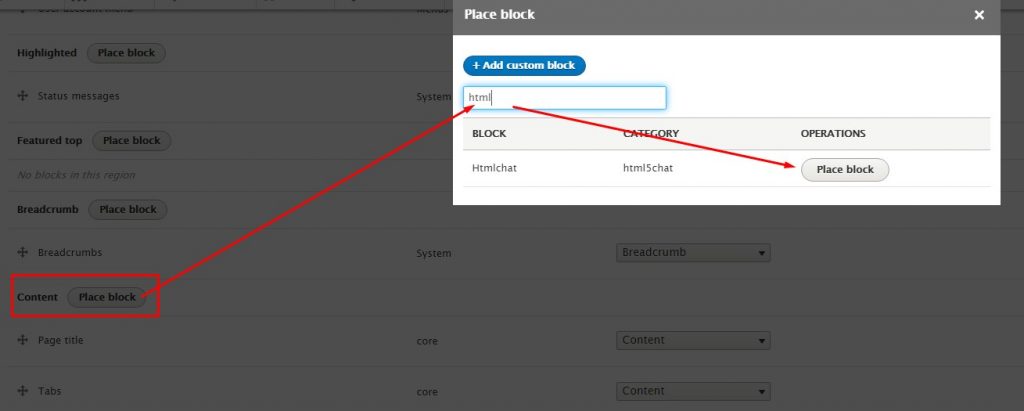
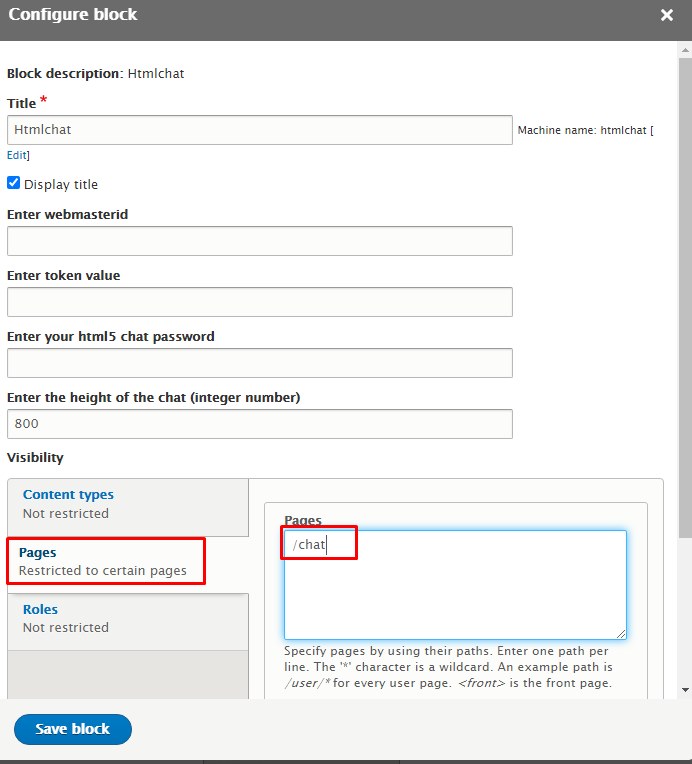
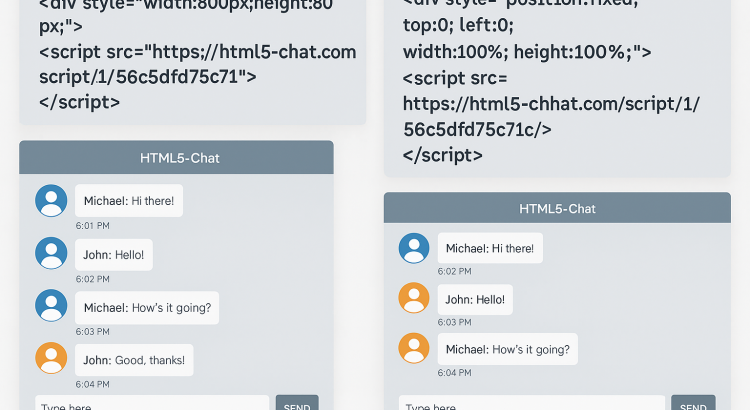
How to Embed HTML5-Chat Inside a Specific DIV
If you want the chat inside a block with a fixed size:
<div style="width:800px;height:800px;"><script src='https://html5-chat.com/script/1/56c5dfd75c71c'></script></div>
Customize width and height:
Just change the values:
<div style="width:600px;height:400px;"><script src='https://html5-chat.com/script/1/56c5dfd75c71c'></script></div>
Or make it responsive:
<div style="width:100%;height:600px;"><script src='https://html5-chat.com/script/1/56c5dfd75c71c'></script></div>
How to Display HTML5-Chat in Full Screen Mode
Sometimes you want the chat to cover the entire page and behave like a standalone application. Use this example:
<div style="position:fixed; top:0; left:0; width:100%; height:100%; margin:0; padding:0; z-index:9999; "><script src='https://html5-chat.com/script/1/56c5dfd75c71c'></script></div>
Now your page becomes a full-screen chat interface, ideal for:
- Live streaming
- Chat rooms
- Full page messaging
- Fullscreen support & mobile-friendly display
How to Make the Chat Responsive
For a layout that automatically stretches to the screen size:
<div style="width:100%;height:100vh;"><script src='https://html5-chat.com/script/1/56c5dfd75c71c'></script></div>
✔ 100vh = 100% of viewport height
✔ Works on mobile, tablet and desktop
Advanced customization examples
Add a border and rounded corners:
<div style=" width:800px; height:600px; border:2px solid #ccc; border-radius:10px; overflow:hidden; "><script src='https://html5-chat.com/script/1/56c5dfd75c71c'></script></div>
Center the chat on screen:
<div style=" width:800px; height:600px; margin:0 auto; "><script src='https://html5-chat.com/script/1/56c5dfd75c71c'></script></div>
SEO Benefits of Using HTML5-Chat
Adding HTML5-Chat to your website does more than improve user interaction—it also increases your SEO performance:
✔ Longer visitor retention time
People stay longer → Google loves it.
✔ Reduced bounce rate
A chat increases engagement.
✔ More internal traffic
Visitors interact and browse.
✔ Improves user experience
Better UX = better rankings.
This makes HTML5-Chat ideal for:
- Community sites
- SaaS platforms
- Membership websites
- Portfolio sites
- Forums and marketplaces
Final Thoughts
HTML5-Chat offers a fast, reliable and easy way to add a modern chat system to any WordPress website. The installation requires only one single script, and the layout can be embedded anywhere:
- Inside any page or post
- Inside a custom DIV
- Responsive layout
- Fullscreen chat room
If you want an online chat solution that is simple, flexible, and powerful, HTML5-Chat.com is one of the best choices available today.