volume2

Display Volume on cams

You can now have a visual volume indicator inside any webcam.

To enable that feature, go to chatadmin/config/webcam and set
Display user volume

The volume will be displayed inside the webcam and inside the userlist

Volume indicator…

You can also display an effect on video (red border) when volume is detected (when user speaks or streams sound): you have to check this propetry:

Add red border on webcam when volume detected (addEffectOnVolumeDetection) in chatadmin/config/webcam

Red border effect on volume detection.

Sngine : Social Network PHP script

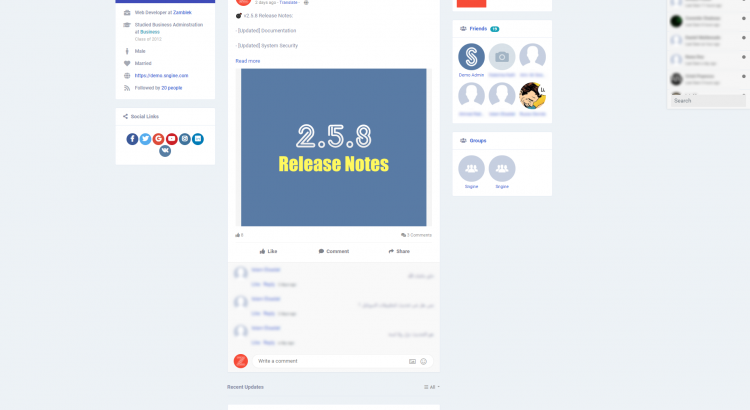
Sngine – The Ultimate PHP Social Network Platform is a cool php script.
How to integrate html5 chat into that script ?

Edit the .htaccess file and add these lines:

# Chat
RewriteRule ^chat/?$ chat.php [L,QSA]

Create chat.php file and paste this code:

<?php
$webmasterid = xxxx; // your webmasterid html5chat account
$password = 'yyyy'; // your html5 chat password
require('bootloader.php');
if (!isset($user) || !isset($user->_data) || !isset($user->_data) || !isset($user->_data['user_id'])) {
    header('Location:/');
}
if ($user->_is_admin) {
    $role = 'admin';
} else if ($user->_is_moderator) {
    $role = 'moderator';
} else {
    $role ='user';
}
$user = $user->_data;
$json = json_encode(array(
        'id' => $user['user_id'],
        'username' => $user['user_name'],
        'password' => $password,
        'gender' => $user['user_gender'],
        'role' => $role,
        'image' => base64_encode($user['user_picture']),
        'profile' => "https://yoursite.com/{user['user_name']}"
    )
);
$encoded = file_get_contents("https://jwt.html5-chat.com/protect/" . base64_encode($json));
?>
<!doctype html>
<html lang="en">
<head>
    <meta charset="UTF-8">
    <meta name="viewport" content="width=device-width, user-scalable=no, initial-scale=1.0, maximum-scale=1.0, minimum-scale=1.0">
    <meta http-equiv="X-UA-Compatible" content="ie=edge">
    <title>Chat</title>
    <style>
        html, body, #chatContainer {
            width: 100%;
            height: 100%;
            margin: 0;
            padding: 0;
        }
    </style>
</head>
<body>
<div id="chatContainer">
    <script src="https://html5-chat.com/script/<?= $webmasterid ?>/<?= $encoded ?>"></script>
</div>
</body>
</html>

Edit the first lines and put your own data

$webmasterid = xxxx;
$password = 'yyyy'; 

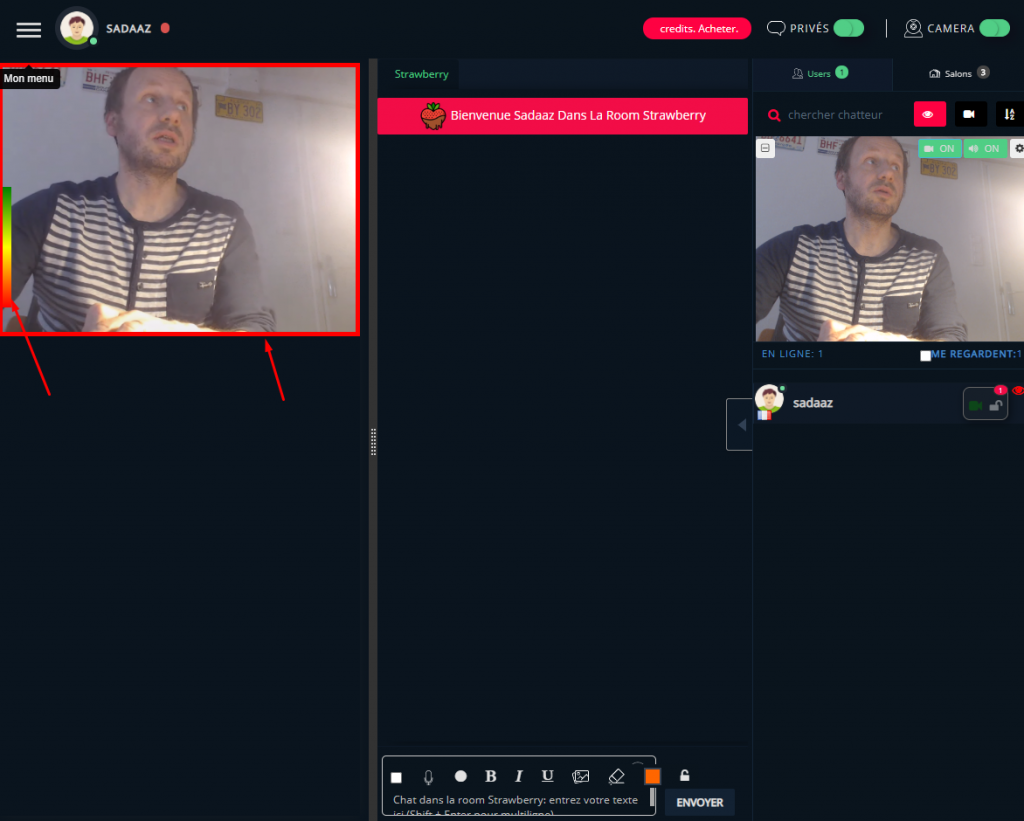
Then navigate to yourSite.com/chat

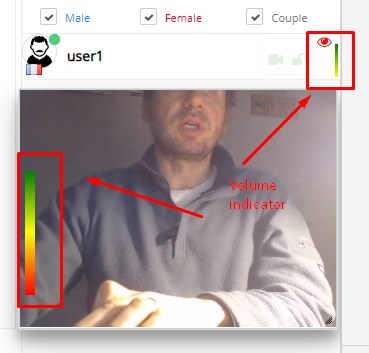
and you should see WHOLE page html5 chat

web radio

html5 chat and webradio (updated)

Set a global radio for your chat

You can set a global webradio player for whole site. Just go to your chatadmin / config and specify a valid https resource for your radio

or set a radio per room !

You can now specify a webradio per room. Just go your chatadmin/room and specify (or leave blank) a web radio url for each room

Audio restrictions

How to customize the radio look&feel ?

In fact the webradio is just a html <audio> element.
So it is quite limited to make some customizations. However we will add some better player soon like: https://www.mediaelementjs.com/

Where to find Radio streams ?

Google is your friend: You can easily find thousands of free radios
ex: http://dir.xiph.org/

But.. make sure they are playable inside the html5 <audio>element (mostly of time they should be .mp3 files)

How to start webcams muted ?

This is also a frequent question. You can now start webcam muted in a room. (go to your chatadmin ->rooms)

But you can also assign muted webcam per role.
(go to chatadmin->roles->advanced)

Ex: admin And DJ roles will have webcam no muted, whereas roles like guest and user will have their webcam muted

background

How to add picture to background ?

This is a common question we receive. The answer is obvious to who knows some CSS.
I recommend to read the post about customizing the design with CSS.

For people who do not have CSS knowledge

First, it is really important you learn CSS since design on web is totally related to CSS. Let add a background image for you chat step by step

  1. Prepare Picture
    You background picture should have a good size (ex: 1024x800px) and should be available somewhere on the web accessible through HTTPS
    ex:
    https://c.pxhere.com/images/d1/a4/ccfdcc5bc5f116abc867b0e9c7f7-1458005.jpg!d
  2. With your editor (notepad for instance) create a file with .css extension ex: myCss.css
  3. Edit this file and insert that code inside
#container {
background-image: url("https://c.pxhere.com/images/d1/a4/ccfdcc5bc5f116abc867b0e9c7f7-1458005.jpg!d");
background-size: cover;
}
#tabs .nav-tabs {
background-color: inherit;
}
#roomsContainer2, #usersContainer2, #friendsContainer2 {
background-color: inherit;
}

#footer {
background-color: inherit;
}

#tabs .tab-pane {
background-color: inherit;
}

#tabs {
background-color: inherit;
}
#usersContainer {
background-color: inherit!important;
}
  1. Save that file and upload it to YOUR server so it is accessible with HTTPS
    ex: https://www.mysite.com/myCss.css
  2. Go to you chatadmin, go to config and then choose design/layout tab and insert that link ( https://www.mysite.com/myCss.css) in the Link to external CSS to customize your chat  field
inside config

6. and that’s all: the background image should be inside your chat

This is also the procedure to change the design of any element of your chat. With CSS you can customize EVERYTHING you want, including the layout.

tab mode

New Tab mode

The tab mode in html5 chat has now two new features. (the tab mode is one of the display mode available in chat). It displays webcams on top of the screen. These webcams are sortable

Splitter to resize webcams

You can use the splitter to resize the webcams.

Resizable webcams

Pop in and pop out webcams

You can pop out the windows from the tab and make them independent draggable and resizable windows and pop them back to the stack.

pop out and pop back the windows

To enable the tab mode, just go to your chatadmin and set the display mode as “tab

Html5 chat and Joomla Full screen (update)

To run the Joomla plugin in full screen mode, you need to edit the plugin located in

/plugins/content/html5chat/html5chat.php

and change the content of $script by

    $script = "<style>
    #iframeChat {
        height: 100%;
        width: 100%;
        border: none;
        position: absolute;
        left: 0px;
        top: 0px;
        z-index: 9999;
    }
    </style>";

    $script.= "<script src='https://html5-chat.com/joomla/$webmasterid/$encoded'></script>";
    $script.="<script>
        jQuery('#iframeChat').detach().appendTo('body');
    </script>";

You chat should then appear in FULL screen above all elements.

HTML5 and Payperview

A new exciting feature: Pay per view mode with HTML5 chat is now available for paid (registered users)

What is “Pay Per View” ?

Pay per view is a special kind of chat where a performer displays his webcam to watchers. This is 1 to many chat : indeed a conference mode chat.

Public and private chat

A watcher can request a private chat to performer. If the performer accepts, other users will be ejected from the room and private chat between the performer and requester starts.
During the private chat, credits from user are decremented and private session data records duration of the private chat. This is why it is called : pay per view: as long as user stays in private chat, he pays (credits) for the show.

Pay per view video chat : what for ?

This pay per view mode is suitable for:

  • E-learning sessions, teachers
  • Erotic pay per view shows (livejasmin like)
  • Clairvoyance site, astrologists
  • Consultants, lawyers
  • Any kind of chat when you need user to pay to watch private cam

How does it work ?

A webmaster can have many performers. When user arrives to the performers wall, he will see performers photo avatars and status: online, offline or busy (already in private chat). He clicks on the performer’s picture and enter the performer’s avatar. If he has credits, he can request a private chat and private chat will start as soon as performer accepts it.

2 different pay per view modes

We have 2 different pay per view mode integration:

  • Embed mode: no coding knowledge is required at all. You just defines prices, performers, insert your paypal email to receive payments and you are ready to go: this is a 5 minutes process.
    This is suitable for people with no coding knowledge at all. All data, records, reports, and performers data are stored on html5 chat servers.
    Here are details about how to setup the payperview in embed mode
  • External mode: you need some coding knowledge such as calling REST API, JSON encoding. This is suitable when you want all payment process and data to be stored on your own servers. This mode is suitable for people who owns already a website and have serious coding knowledge. This is a 2 – 4 hours process.
    Here are details about how to setup the payperview in external mode.
    Here are details about how to setup the payperview in external mode

If you need the external mode but do not have enough coding knowledge, we can do the job for extra cost. Please contact us by skype: proxymis

How to setup the payperview in external mode

The external mode allows you to host all data (like payments history, liveshows history, performer data) on your own server. However the webrtc chat is hosted on html5 chat servers.

This means that your server and the chat will have to communicate together. They will communicate through AJAX REST calls. That’s why you need to implement on your server some JSON answers so the html5 chat can request your server.

This means: you need developer knowledge to do that. If you do not have some, you can ask a freelancer to do the job for you (we can also do that for an extra fee). You can also choose the easy embed way to integrate the payPerView as described here. However the embed method means that all data are stored on our servers.

There are 2 pages to be created:

You have to create yourself these 2 pages that will be stored on your own server.

  1. the listing page: here are where users will see the listing of performers and where he can select a performer and join her into her room. (ex: listing.php)
  2. the model chat page: here is the place where performer will enter the chat. (ex: performer.php)

Database tables

In the external embed mode, you will have to store all data (models, payments, shows history). Here we provide some data structures you will need (but you can modify them or use your own)

Table ppv_tips : this is the most important table: it stores all tips that a performer receives from an user (as tip or as private live show).
We recommend you use the same structure as the one we provide here.

CREATE TABLE ppv_tips (
id bigint(20) NOT NULL,
date datetime NOT NULL,
action enum('tips','liveshow') CHARACTER SET utf8 DEFAULT 'tips' COMMENT 'is that tips or show ?',
userid int(11) NOT NULL,
performerid int(11) NOT NULL,
credits int(11) NOT NULL DEFAULT '0',
price decimal(10,3) NOT NULL DEFAULT '0.000' COMMENT 'price of the tip',
performerBenefit decimal(10,3) NOT NULL DEFAULT '0.000' COMMENT 'benefit a performer will get from that tip'
) ENGINE=InnoDB DEFAULT CHARSET=utf8mb4;
ALTER TABLE ppv_tips
ADD PRIMARY KEY (id);
ALTER TABLE ppv_tips
MODIFY id bigint(20) NOT NULL AUTO_INCREMENT;

Table ppv_item: table when you store items that clients will purchase (ex: 600 credits for 10$)
When an user purchases an item, you have simply to update his credits.

CREATE TABLE ppv_item (
id int(11) NOT NULL,
seconds int(11) NOT NULL DEFAULT '600',
price decimal(10,2) NOT NULL DEFAULT '10.00',
description varchar(255) CHARACTER SET utf8 NOT NULL
) ENGINE=InnoDB DEFAULT CHARSET=utf8mb4 COMMENT='prices of credits';
ALTER TABLE ppv_item
MODIFY id int(11) NOT NULL AUTO_INCREMENT;

The ppv_paypal : table that will store all transactions done using paypal (you can of course use any payment you want)

CREATE TABLE ppv_paypal (
id int(11) NOT NULL,
txn_id int(11) NOT NULL COMMENT 'transaction Paypal',
webmasterid int(11) NOT NULL,
userid int(11) NOT NULL,
price decimal(10,2) NOT NULL,
credits int(11) NOT NULL,
ppv_itemid int(11) NOT NULL,
item_name varchar(100) NOT NULL,
date timestamp NOT NULL DEFAULT CURRENT_TIMESTAMP,
log text NOT NULL
) ENGINE=InnoDB DEFAULT CHARSET=utf8mb4;
ALTER TABLE ppv_paypal
ADD PRIMARY KEY (id),
ADD KEY userid (userid),
ADD KEY ppv_itemid (ppv_itemid);
ALTER TABLE ppv_paypal
MODIFY id int(11) NOT NULL AUTO_INCREMENT;

Ajax Calls / REST

Now, when you created all data structures, you will need the HTML5 chat to be able to communicate with your server, especially to update the data you will store in the tables you created.

This article is still under construction. Please come back later….